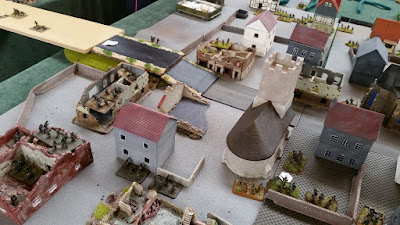
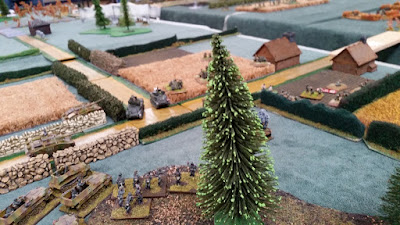
To round off the Flames of War Market Garden campaign we had
a suitably sized battle, devised and successfully run by Andy Canham, and taking
in the scope of the whole of the operation.
It took no account of the overall campaign situation because that would
have complicated his planning, and I felt it was better to let Andy’s
creativity take centre stage. The battle
took place over 2 days, and over 5 tables, running from 30 Corp’s start lines,
through Eindhoven and the 82nd Airborne’s drop zones, on to Nijmegan
and the 101st Airborne, before arriving at Arnhem where the 1st
British Para’s dropped outside the town and moved in, and the Polish arrived
south of the Rhine and Arnhem. As with
any recreation of such a big battle there is a fair bit of artistic license
regarding the number of bridges and roads, with a second ‘main’ road bypassing
Eindhoven, but using a smaller bridge which slowed the movement of troops. The bridges were represented by MDF pieces
between the tables, and worked nicely.
Participants – Allies:
James – 82nd Airborne
Andy (CO) – 101st Airborne
Dennis – Polish Paratroopers
Phil – 1st British Paras
Ian – 30 Corp
Rich – 30 Corp
Participants – German:
Ben – Counter attack on the Nijmegan and Island tables
Owain – SS troops facing the Brits in Arnhem
Peter – Defending against 30 Corp and the 82nd
Airborne and assisted by….
Dafydd – Re-enforcing and counter attacking around Eindhoven
and Nijmegan
Red – armoured battle group attacking the 101st
I am unable to complete the full blow by blow partially
because I wasn’t present on day one, and partially because it was a big enough
battle for me to miss most of it stuck down in the traffic on Hells
Highway. As such I’m going to give a
tongue in cheek diary report from my commanders point of view J.
 |
| Arnhem; Brits in the centre coming under increasing pressure from Owains SS. |
 |
| A long shot down the tables from Arnhem. |
 |
| 2nd table - Eindhoven in the distance, with James' 82nd spread across the table. |
Diary entry: Lieutenant Colonel John Ormsby Evelyn Vandeleur
(Mr) – September 1944
Woke up.
Had shave.
Checked moustache quality and stiff upper lip. Both sufficient for task.
Arrived at the unit to be briefed on the operational
situation. So far so good; Yanks 82nd
have landed successfully around Eindhoven and hold the roads, 101st
hold the Maas-Waal and Grave Bridges, and the Polish bunch (thank goodness for
this unhistorical and conveniently good weather) are stretched between the
Nijmegen and Arnhem bridges on the marshy ‘island’, and hold both. Our own boys; the 1st Airborne,
have landed and moved into Arnhem against light resistance. Whole road connected by the carpet of paras
from Eindhoven to Arnhem. Negative news
from the road to Eindhoven, the lead Guards troops have so far failed to reach
the Valkenwaard Bridge, where there are reports of German armour and artillery
in situ.
Update: on the road amongst the Shermans of my Guards
battalion, early in the day and already reaching the tailbacks on the road to
Eindhoven. The German armour has been
allowed to withdraw unmolested across the bridges towards the Yanks in
Eindhoven and take up stronger positions.
Fortunately to my left I can see the movement of Shermans, and behind
them Cromwells racing up the alternative route, hopefully the weaker bridge
won’t slow them down. Reports arriving
of light fighting there, and of SS troops clashing with the Paras in Arnhem. All quiet on the Polish and 101st
front.
 |
| Ian's Shermans across the first bridge, connecting with the 82nd, and taking fire from concealed AT guns to the left. |
Approaching the bridge in my armoured car – sheer chaos
awaits me! The lead Shermans are on the
bridge, and the final German troops have withdrawn to the hedgerows and
buildings on the edges of Eindhoven where they are fighting a sharp action with
the outnumbered 82nd Yanks. German
tank hunters are reported in the area just across the bridge, and the lead
units are being too cautious in getting across.
The queuing armour is now a significant issue; thank goodness there is
no air or artillery power available to the enemy! Better news to my left where the lead
armoured units, led by Stuart light tanks, are across the bridge and powering
along the road towards the next bridge and the connection with the 101st. Progress slightly checked by the threat of AT
guns on their left. The Cromwells are
now starting to cross, but painfully slowly.
Beyond Eindhoven more German units can be seen arriving, and while the
82nd have cleared the road for this second column on my left, they
are starting to come under heavy pressure in the town itself. The 101st units report a German
armoured battle group has arrived to the West and is moving in on their
positions and may cut the road there.
 |
| The queue begins to build on the way towards Eindhoven and the first bridge. |
 |
| Cromwells racing forwards. |
 |
| Serious traffic problems as the Eindhoven road begins to look like the M6. |
 |
| Peter's troops have withdrawn across to the edges of Eindhoven, and are putting pressure on James' 82nd (in and around the church) as well as firing back across the river at Ian's advancing Shermans. |
 |
| Bottleneck. Ian's lorries appear to breakdown and the Cromwells start to stack up. |
 |
| Red's armour trading shots with Ian's Shermans. |
Finally the lead Guards units are across the bridge and on
the edge of Eindhoven, but the traffic chaos their tardiness has left behind
means it will be some time before I can shake my troops out into some kind of
order and support them. On the positive
side however their presence, and the opening up of our artillery (finally moved
into position) has removed some of the pressure on the 82nd in Eindhoven,
and the German armour reportedly on the edge of the town and the road has
withdrawn from the field. The 101st
are now under heavy attack on the far road from that armoured battle group, and
most frustratingly our own armour has stopped to take cover once more, ignoring
the need to keep going forward.
Fortunately the paras are holding their own, but are dangerously close
to being cut off from the bridge. The
Polish, of which I have thankfully little need to write about, have dealt with
an armoured attack between the Arnhem and Nijmegen Bridges. It became bogged down in the marshy land of
the ‘island’, and the paras 17pdrs did the rest, sterling stuff! Not such good news from Arnhem itself where
Jonny Frost and his boys are now being pressed back into the approaches of the
bridge by superior numbers. I’m starting
to think someone up at HQ was having a laugh with the words ‘boys and old men’.
 |
| Ian finally over the bridge as Peters troops begin to fall back. |
 |
| 82nd Paras in the church in Eindhoven. |
 |
| The end of the Jadgpanthers. |
 |
| Phils British paras being forced back into a smaller area by Owains agressive SS. Note the Polish in the building to the left of the bridge. |
 |
| Add caption |
 |
| Add caption |
 |
| Reds infantry try to force the 101st back but are unsuccessful and take heavy casualties. |
 |
| Add caption |
 |
| Street fighting in Arnhem. |
 |
| Comfortable Polish troops by the Arnhem bridge. |
 |
| Arnhem. |
 |
| Nijmegen - peaceful throughout. |
 |
| Dafydd's troops storm the Maas-Waal Bridge while retreating from Ian's armour. |
Operation over. Its
all gone a bit wrong. The 82nd
Yanks have held on long enough for my boys to cross in large numbers in their
Shermans and the Germans are pulling out of Eindhoven or surrendering. Unfortunately they haven’t been prevented
from reaching the Maas-Waal Bridge, which they have subsequently captured from
the combined 82nd and 101st, and now we will have to
force a crossing there. The 101st
have also been pushed away from the bridge to the left by that armoured
battlegroup as I feared they might do.
The lead Guards unit stopped and the Yanks failure to hold onto the end
has cost us the only other crossing point.
This has left the bulk of the 101st, the Polish and the 1st
British Airborne all cut off still. The
Polish are currently still unthreatened by the enemy, but have had to move
troops into Arnhem to prevent our boys being overrun near the bridge. It’s all been a bit of a debacle.
Battle Overview:
Phil’s British paras in Arnhem initially secured the town, but were gradually forced back and contained on the approaches to the Bridge by Owains SS. Dennis’ Polish easily held off Ben’s attempted with his StuG’s to cut the road and reclaim the bridges, and held both the Arnhem and Nijmegen Bridges and Nijmegen itself. He even had time to send a platoon into the town of Arnhem to help Phil. Andy’s outnumbered 101st stood up well to Red’s armoured battle group, but still ended up being cut off from the Bridge as Red recaptured it in the dying moments of the game while holding off Ian’s 30 Corp lead Shermans in a Mexican standoff. The 101st were also forced away from the Maas-Waal Bridge in the last few turns to leave that in Dafydd’s German hands. James’ 82nd Paras successfully cleared one road for Ian’s (and my) left armoured drive – the one that stalled in front of Red, while tenaciously holding out in Eindhoven against Peter and Dafydd and their infantry, artillery, Tigers and Jadgpanthers. Ian’s right hook of Shermans stalled on their way to the bridge, and then progressed only very slowly when they made it over thanks to Peters tenacious defending, but did manage to drive the Germans back from the edge of Eindhoven. My own army (all 5,000pts of it!) did nothing all game as it, and Mr Vandeleur, sat in a very historical traffic jam behind Ian’s troops.The Battle & Campaign Winners and Losers:
Andy decreed that although they had lost Eindhoven the
Germans had contained the Paras, and cut the roads by claiming both bridges
across (credit Red and Dafydd) and as such had won the battle. Further credit to Peter for stalling so
successfully on both roads and threatening Eindhoven throughout.
From a campaign point of view the Allies had managed to
wrestle both the Nijmegen and Arnhem Bridges from the Germans, but the Germans
replied by capturing several of the Allies minor bridges, and this was just
enough to give them an Tactical Victory.
This, my Firestorm book informs me, was the historical outcome of Market
Garden, and goes on to say to the Germans:
Your quick response to
the Allied airborne attack has brought many casualties to the Allies. Although you have lost some ground you have
stopped the advance and secured the Northern flank of the West Wall. You have earned title as der Ritter der Westlichen Front.
Reward your commanders for they have truly earned it.
So there you have it, Operation Market Garden 2015 Winners:
The Germans! And as Ben (German CO) has
been declared der Ritter der Westlichen
Front he should surely be treating all the German players to cake.


