The British 1st Airborne were the great successes
of the day/turn/whatever with their attack on Arnhem Bridge in the early
morning. Advancing under cover of
darkness they even had the temerity to wipe out several firestorm units on the
way, and despite being very low on supplies due to the weather they captured
the bridge intact, and have set about fortifying it. The American 82nd, also low on
supplies and prophylactic kits further down the road kept their heads down,
while their buddies in the 101st fought a strong German
counterattack along the Heesh Road to a standstill, and moved up as darkness
fell to capture the Grave Bridge. Exploitation moves saw the 101st
recapture the Heesh Road.
Airborne Battles:
- Dennis once more switched sides in a style more reminisce of
an Italian or Romanian general, and led his out of supply and confident veteran
British paratroopers to capture Arnhem Bridge from Dafydd’s infantry.
- The 101st were brought to the table by James
Underwood who staved off vastly superior German numbers (Phil) to claim a draw
and hold the Uden Road before an exploitation move regained the Heesh Road.
The British armour tried its best to continue its push
towards Nijmegen, finally capturing the Weert Road, and securing Helmond Bridge
and the Gemert Road to protect XXX Corps main drive for the Rhine. This was despite strengthening German
resistance and localised counter attacks, particularly strongly around the
Grave Bridge where the lead elements of XXX Corp were thrown back in disarray,
and have fallen back to a new line at the Son Bridge. A particularly strong German attack severed
the Gemert Road, leaving the lead armoured units cut off. However this success was bitter sweet for the
Jerrys with more British armour capturing the Venray Road, and cutting off the
entire central German position.
Armour Battles:
- Campaign turn 2 dawned bright and early for Aidan and his 11th
Armoured Cromwells, who set about rectifying their previous two failures to
force a passage up the Weert road, defeating James Taylors Panzer IV’s on the way.
- Ian Shaw’s Shermans switched to the XXX Corp axis, and
having linked up with the 101st they attacked up the Uden Road
towards the Grave Bridge, only to be thrown back by Pete’s German defenders,
who occupied the Uden Road and Veghel Bridge.
- More Shermans were in action on the VIII Corp road with Andy
sending them against James Taylors overworked and once again burning
Panzers. Victory for the British saw
them capture the Gemert Road.
- As Andy fought, Phil launched a very stationary
counterattack on Helmond Bridge, hoping to cut the head off the snake. Ricks outnumbered British armour met and
fought him to a standstill to prevent the spearhead being cut off.
- The three rolled for battles in turn 2 saw the Germans
capture Gemert Road, but then be cut off as the British captured Venray Road,
and also moved elements of the 101st onto the Grave Bridge.
 |
| The German counterattack on Helmond Bridge is met by a wave of Shermans. |
 |
| 11th Armoured on the attack at Helmond. |
 |
| More of VIII Corp, this time attacking down the Gemert Road. |
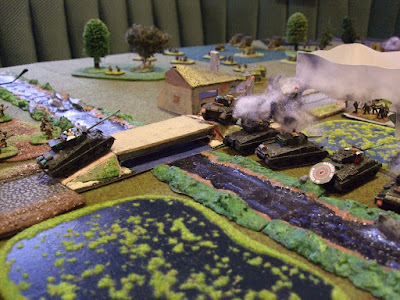 |
| XXX Corp crossing the Grave Bridge, unsuccessfully. |
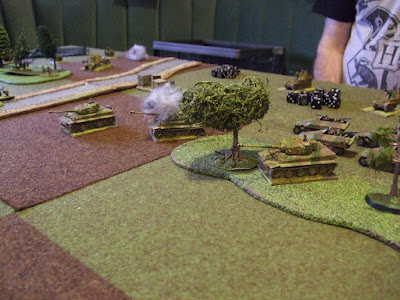 |
| XXX Corps opposition. |
 |
| More of Ian's XXX Corp Shermans. |
 |
| German security forces defending the approaches to Arnhem Bridge. |
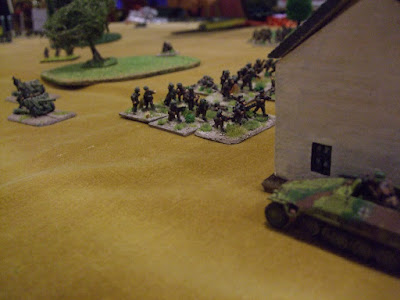 |
| British Paratroopers taking advantage of the darkness before dawn to steal closer to the German positions around the bridge. |


